
Berthing a 200-meter bulk carrier in a narrow harbour channel is the moment where most Professional Ship Simulator careers live or die, and that single experience is exactly why a focused manoeuvring guide matters. The gap between a clean port call and a hull-scraping disaster usually comes down to tug support, anchor timing, and harbour-side communication, all of which this Professional Ship Simulator manoeuvring guide unpacks step by step. Think of the next 1,600 words as a pre-shift briefing: by the end you should know when to call tugs, how to drop the hook in a controlled way, and what every button on the tugboat-mission radio actually does.
Reading a Harbour Before You Enter It
Every tight berthing starts long before the bow crosses the breakwater, and in Professional Ship Simulator the harbour approach is where decisions compound. Pilots and harbour control in the sim mirror real-world hierarchy, so listening on VHF and reading AIS contacts before committing to a channel is the first habit to build. A good Professional Ship Simulator port guide teaches you to slow down, identify the assigned berth, and pre-plan the tug configuration you will request once the pilot is aboard.
Harbour Types You Will Meet
The game ships with several harbour archetypes, each demanding a slightly different approach speed and tug count. Inner-city marinas reward slow, deliberate movements; commercial bulk terminals punish impatience with rigid fenders. The table below summarises how a new skipper should treat each environment on the first three career shifts.
| Harbour Type | Typical Vessel | Recommended Approach Speed | Tug Count (Default) | Watch-Outs |
|---|---|---|---|---|
| Marina lock | Yacht medium | 2–3 kn | 0–1 | Tight lock walls, pedestrian traffic |
| Bulk terminal | Bulk carrier | 4–5 kn | 2–3 | Strong cross-current near the pier head |
| LNG jetty | LNG tanker | 3–4 kn | 3 | Safety exclusion zone, gas-line fenders |
| Cruise pier | Cruise ship | 3–4 kn | 3–4 | Mooring line crew, gangway clearance |
| Fishing port | Fishing trawler | 1–2 kn | 0–1 | Small craft congestion, nets in water |
Pre-Entry Checklist
Before the pilot boards, work through a short mental routine. Confirm the Assigned Berth on the harbour map, verify fuel reserves against the Professional Ship Simulator fuel system primer recommendations, and check wind direction on the bridge instruments. Wind on the beam is the single most common cause of a sideways drift in a narrow fairway, and it is the variable that will dictate whether you need one tug or three.
Requesting Tug Support the Right Way
Tugs are force multipliers, but only when you ask for them in the correct sequence. The radio menu inside Professional Ship Simulator lets you call the closest harbour with tug boats available, then choose where each boat should be positioned: bow port, bow starboard, center port, center starboard, stern port, or stern starboard. After positioning is set, you decide whether each individual tug Pulls or Pushes by clicking the blue position button. This is where most rookies lose control of the berthing, because they request tugs in bulk instead of treating each boat as a surgical tool.
Tug Positioning Cheat Sheet
| Vessel Position | Tug Placement | Best Use Case | Risk If Misused |
|---|---|---|---|
| Bow port | Pull | Stopping forward momentum | Stalls the bow, kills steerage |
| Bow starboard | Push | Rotating bow to port | Slams the tug into the fender |
| Center port | Pull | Holding midship against a quay | Forces the stern to swing out |
| Center starboard | Push | Counter-acting beam wind | Can breach the hull under heavy wind |
| Stern port | Push | Kicking the stern to port | Prop walk on the assisted ship inverts |
| Stern starboard | Pull | Holding stern against current | Stalls the rudder completely |
A solid Professional Ship Simulator manoeuvring guide habit is to call only the tugs you actually need for the phase you are in. Two tugs on the bow and one on the stern is a classic three-tug berthing for a cruise ship; a yacht in a marina rarely needs anything more than a single bow push. Requesting every available tug at once is the sim equivalent of driving a sports car with the handbrake on, slow, unresponsive, and prone to sudden snap-rolls.
Push vs Pull in Practice
The push/pull toggle is not a flavour setting; it is a directional force vector. Pull means the tug tows your hull toward the berth, while Push means the tug leans its bow against your hull and shoves. In a beam wind from starboard, the standard three-tug setup is starboard-bow push, port-bow pull, and stern pull on the side opposite the wind. Players who mix push and pull without thinking usually find their vessel broaching within twenty seconds, because the forces cancel out instead of compounding.
How to Anchor Without Drifting
Dropping the anchor is the second pillar of any Professional Ship Simulator manoeuvring guide, because not every harbour visit ends at a pier. Sometimes you are asked to hold station outside a busy berth until a slot opens, and the only way to do that safely is with a clean anchor drop. The anchor system in the sim allows complex docking procedures, which means the chain pays out dynamically as you reverse over the spot you have chosen, and the brake tension determines how cleanly you will hold.
Step-by-Step Anchor Procedure
-
Slow to 1–2 knots and bring the bow into the wind or current, whichever is stronger.
-
Mark the spot on the chart plotter, ideally in 5–10 metres of water with a sandy bottom — the echo sounder readout confirms depth.
-
Release the brake and let the chain run for a length equal to roughly three times the water depth plus the bow height.
-
Apply reverse thrust gently until the chain snubs and the vessel stops paying out line.
-
Set the brake to full and monitor the AIS to confirm you are not dragging downwind.
A community-favourite anchor trick, mentioned in harbour Discord channels, is to let the chain form a slight catenary before snubbing it, which absorbs gust loads more gracefully. Players who try to set the brake the instant the anchor touches the bottom almost always end up with a snapped chain under the first 20-knot gust.
When NOT to Anchor
Anchoring in a designated Tug-Approach Zone or directly inside a turning basin is a quick way to draw a penalty from harbour control. The tug missions specifically expect you to keep those lanes clear because the tug captain is fighting limited visibility and needs every metre of fairway. If the harbour map shows an exclusion ring with a yellow buoy line, treat it as a no-anchor box and either hold position with the engines or request a pilot slot further downriver.
Tugboat Missions: The Other Side of the Harbour
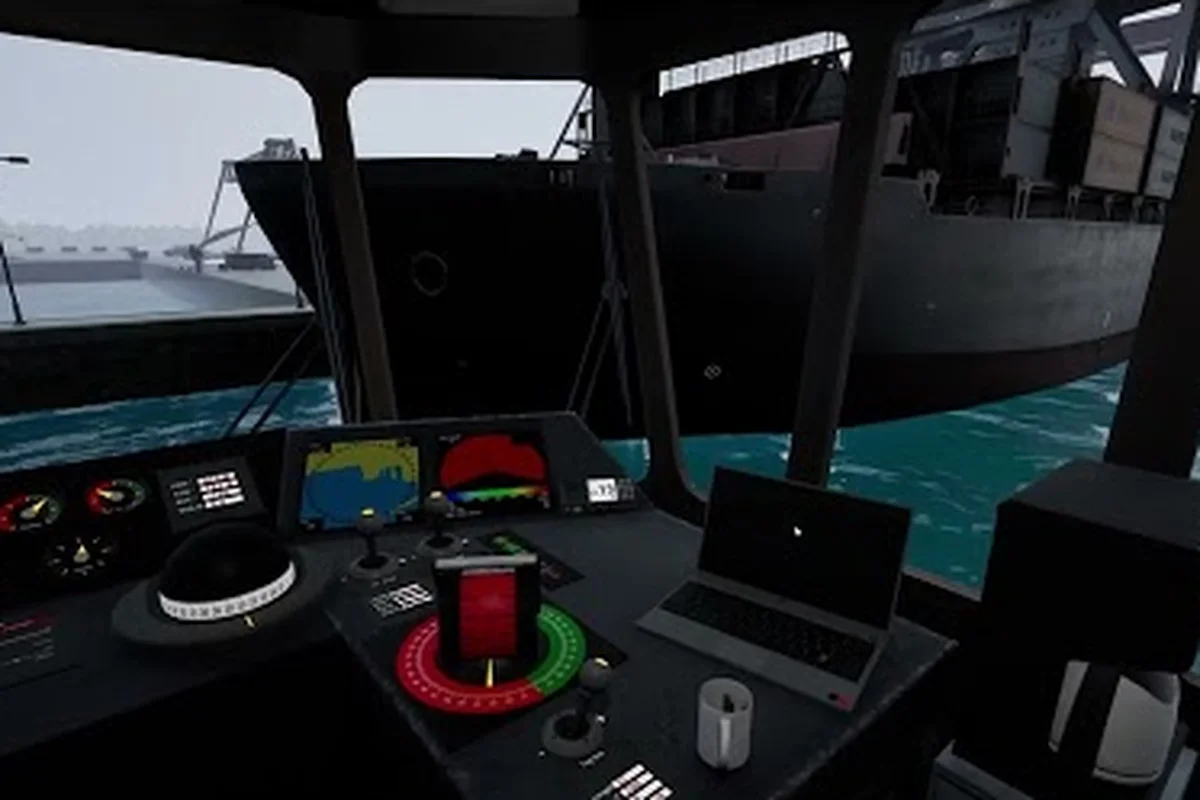
The most underrated angle in a Professional Ship Simulator port guide is the tugboat mission itself, where you stop driving the big ship and start driving the small boat. According to the in-sim mission briefing, the harbour tug captain supports incoming and outgoing vessels in the port area, manoeuvres large merchant ships safely through tight waterways, and assists with berthing and unberthing. The mission emphasises precision, timing, and communication, especially in challenging weather or heavy traffic, and reminds you to use push and pull modes efficiently, avoid shallow water, and ensure safe docking procedures without causing hull damage.
Tug Mission Phases
| Phase | Primary Task | Key Instruments | Failure Cost |
|---|---|---|---|
| Inbound assist | Match course with assisted vessel | Radar, AIS, VHF | Collision with merchant hull |
| Berthing push | Hold contact while ship approaches pier | Throttle, rudder, mooring line view | Fender damage, port fine |
| Unberthing pull | Extract ship from pier into channel | Bow thruster, chart plotter | Prop wash onto quay |
| Outbound escort | Lead ship past breakwater | VHF, range marker buoys | Grounding in shallow water |
| Emergency response | Recover drifting vessel | Radar, engine telegraph | Total mission failure |
Driving the tug is, in many ways, harder than driving the ship you are assisting. The wheelbase is short, the engine response is instant, and every mistake is multiplied by the size of the ship you are touching. A useful warm-up routine is to spend ten minutes in free roam moving a yacht around the marina before accepting a real tug contract, because the small-boat handling is the skill that actually decides whether your big-ship berthing goes smoothly.
Harbour-Side Communication and Pilot Workflow
Radio communication with main harbours and other ships is one of the headline systems in the simulator, and it is the system that turns solo grinding into something resembling an actual port operation. The Professional Ship Simulator harbour guide workflow looks like this: hail harbour control on the working channel, request a pilot, and confirm the tug lineup. Once the pilot is aboard, follow their rudder and engine orders while you retain authority over the tugs.
A clean comms log is also the difference between a smooth shift and a confused pile-up. The table below captures the four calls you should make on virtually every harbour approach, in order.
| Call # | Channel | Recipient | Content |
|---|---|---|---|
| 1 | Harbour working | Harbour control | Vessel name, length, draft, ETA at pilot station |
| 2 | Pilot channel | Pilot boat | Confirm boarding position, tug request count |
| 3 | Tug channel | Lead tug captain | Push/pull assignment per position |
| 4 | Working channel | Harbour control | Final docking report once mooring lines are set |
A common community-reported mistake is skipping the second call and assigning tugs before the pilot has actually boarded. In a busy port, this leads to tug captains being told to push against a ship that is still heading inbound at four knots, which almost always ends with a fender incident and a contract penalty.
Frequently Asked Questions
How do I use tug support in Professional Ship Simulator?
Open the radio menu, select the closest harbour with tug boats available, and assign each tug to one of six positions: bow port, bow starboard, center port, center starboard, stern port, or stern starboard. For each position, click the blue button to toggle between push and pull modes before confirming the assignment.
When should I drop the anchor in a harbour approach?
Drop the anchor when you need to hold station outside a busy berth or in a non-tidal turning area, and only after bringing the bow into the stronger of wind or current. Pay out chain equal to three times the water depth plus the bow height, then gently reverse to set the brake.
What is the difference between a harbour mission and a tugboat mission?
A harbour mission usually has you piloting a large merchant vessel into or out of a commercial berth, while a tugboat mission flips the perspective and has you captaining the small tug that assists those large ships. Tugboat missions emphasise precision and clear communication over raw thrust management.
Can a beginner skip tug support entirely?
In the smallest marinas, yes, a slow yacht can sometimes berth with careful engine and rudder work alone. In any commercial harbour with a bulk carrier, LNG tanker, or cruise ship, skipping tug support is a fast way to damage the hull, miss the slot, and lose the contract reward for safe docking.
How does weather affect tug missions in the simulator?
Beam wind above roughly 15 knots and any current above 1 knot will push your assisted vessel off-line, so you will need more tugs and tighter push/pull assignments. Heavy fog disables visual references, which means you must lean on radar, AIS, and explicit VHF callouts to avoid collision.